Video tutorial on how to crochet hdc in 3rd loop teaches you this special technique of half double crochet that you can use for ribbing.
For a ribbed, knitting-like texture
If you’ve ever looked at a crocheted hat or cowl and thought, “That looks almost knitted!”, chances are the designer used the half double crochet in the 3rd loop technique. This clever trick transforms a basic stitch into a beautifully ribbed fabric, giving your crochet work that stretchy, knitted texture—without ever picking up a pair of knitting needles.
🧵 Why Use the 3rd Loop Technique?
Here are just a few reasons to try this stitch:
Stretch and texture: The ribbing gives your work a slight stretch and a soft, modern look.
Knitted appearance: Ideal if you want to mimic the look of knit ribbing in a crochet project.
Professional finish: Perfect for accessories where texture makes all the difference.
Great for brims: You’ll often see this stitch used in hats—especially where a brim needs to look refined but remain stretchy.
In both patterns, the 3rd loop hdc technique creates a neat, ribbed crown that feels cozy and looks elegant. It’s also beginner-friendly—so if you’re ready to try it, this is the perfect place to start.
🧵 What is the 3rd Loop?
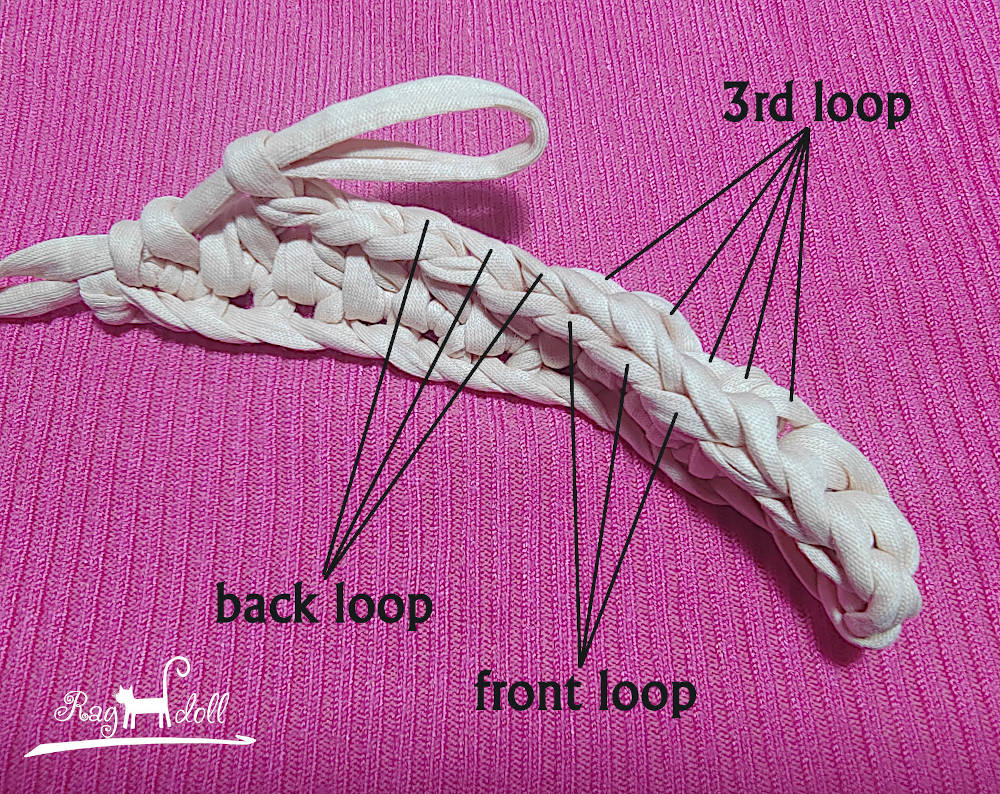
The half double crochet (hdc) is unique because it creates an extra loop. Unlike single or double crochet, which have only two loops on top (front and back), the hdc forms a third loop just behind the top of the stitch. When you normally work into the top two loops, your stitches look smooth and flat. But when you insert your hook into that 3rd loop, magic happens: the top “V” of the stitch gets pushed forward, creating a ridge on the front, and your new stitches sit behind it.
The result? A ribbed, flexible texture that closely resembles knit stitches—perfect for hat brims, cuffs, and cowls.
🧵 Where to Find the 3rd Loop?
When you’re crocheting in rows with turns, the 3rd loop usually appears below the front loop, on the front side of your work.
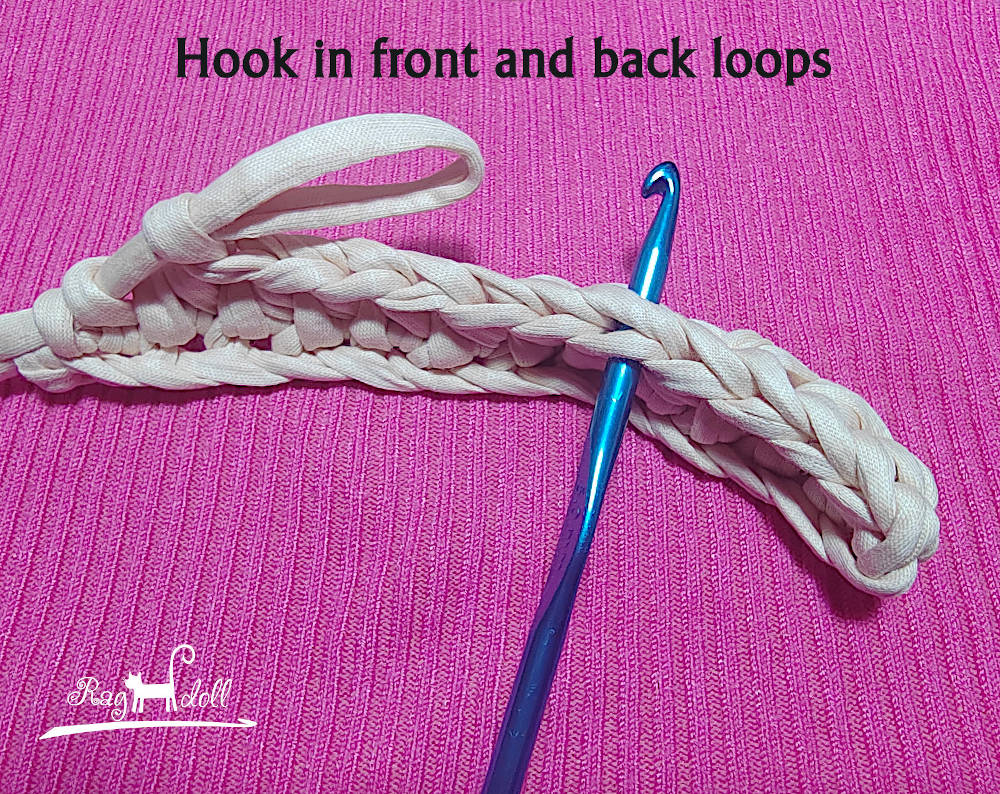
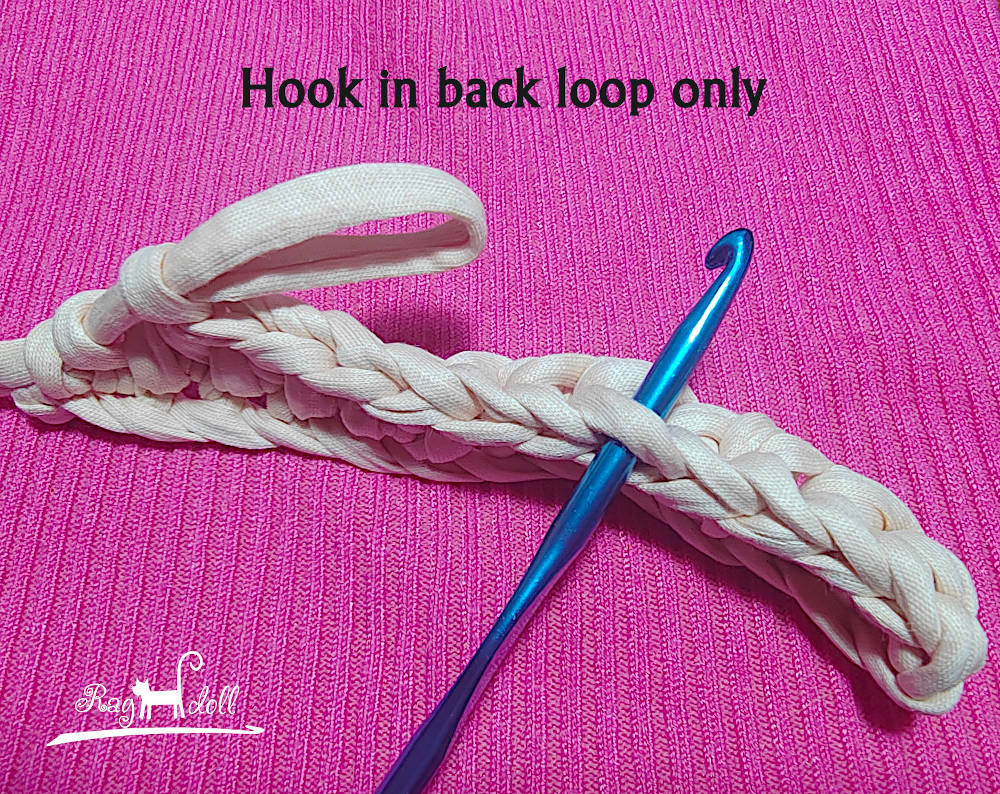
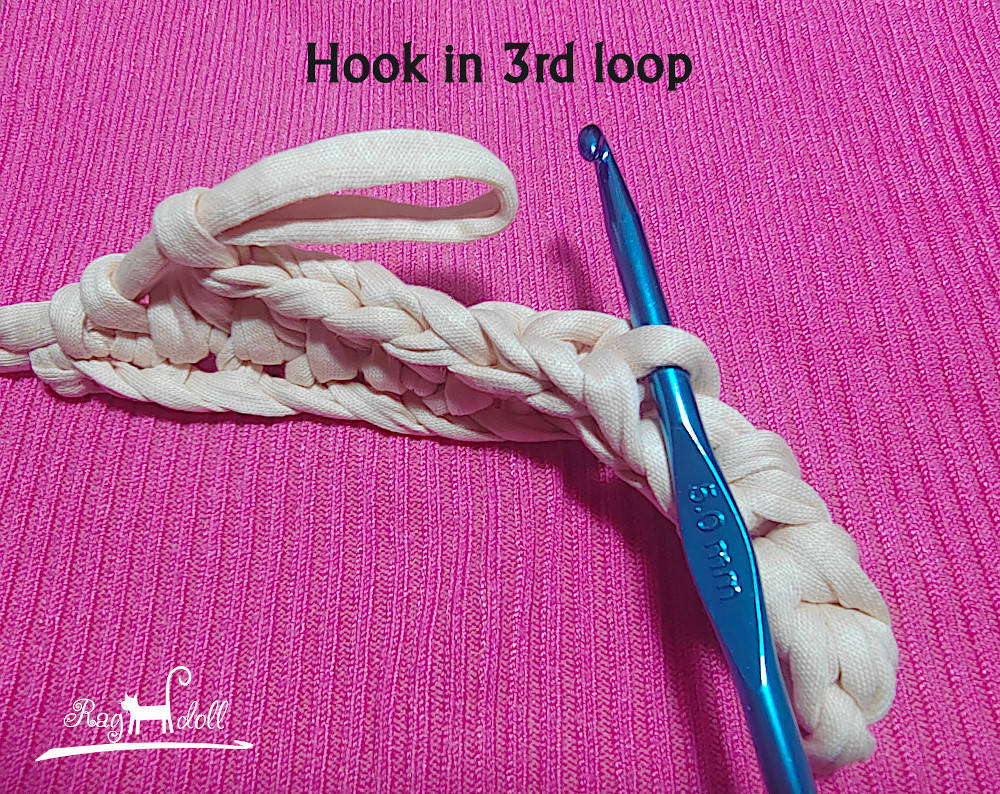
When working in rounds, which is the most common scenario for hats and cowls, the 3rd loop is behind the back loop—just below the top loops of the previous round, but on the back side of your work. In the images below I’m showing you how to identify the 3rd loop is in round crochet.
Once you’ve located that loop, you’ll simply insert your hook there (instead of the usual top loops) and continue making half double crochet stitches.
🎥 Learn with the Video Tutorial
If you’re a visual learner, don’t worry. The video tutorial below will guide you through the process step by step. You’ll see exactly where the 3rd loop is, where to insert the hook, and how to work the stitches in a round.
After just a few rounds, you’ll be hooked (pun intended)! Once you get the hang of it, this technique becomes second nature.
Ready to try? Scroll down and watch the video. Let your next project stand out with this beautifully textured technique.
If you’d like to follow along with a project, check out the written instructions for the Derby Hat or the Derby With A Folded Brim—both of which use this technique to great effect.
Pin for later
Watch the video tutorial and learn how to crochet hdc in 3rd loop