Easy to make rose — a romantic addition to your shawl, blouse, bolero, or as a piece of jewelry
This super simple and free tutorial teaches you to crochet a cute little rose from any kind of yarn.Use it as a brooch or as part of a choker necklace.
A Little Extra From My Crochet Studio
Whenever I send one of my handmade pieces to a customer, I like to include a small surprise in the package. It’s my way of saying thank you for choosing my work and supporting handmade craft. These gifts are usually crochet brooches, since shawls are my most frequent orders — and a small floral accent often matches them beautifully. Occasionally, I add a simple crochet necklace or bracelet instead, depending on inspiration and leftover yarn from the project.
The Story Behind These Crochet Roses
These roses grew out of that tradition. I wanted something elegant but quick to make, something that could complement a shawl without overwhelming it. After some experimenting with yarn textures, stitch combinations, and shaping, I arrived at this simple rose design that works well in many colors and yarn weights.
Some of my customers have already received one of these roses tucked into their shawl boxes, and the reactions have been so warm that I decided to share the instructions as well.
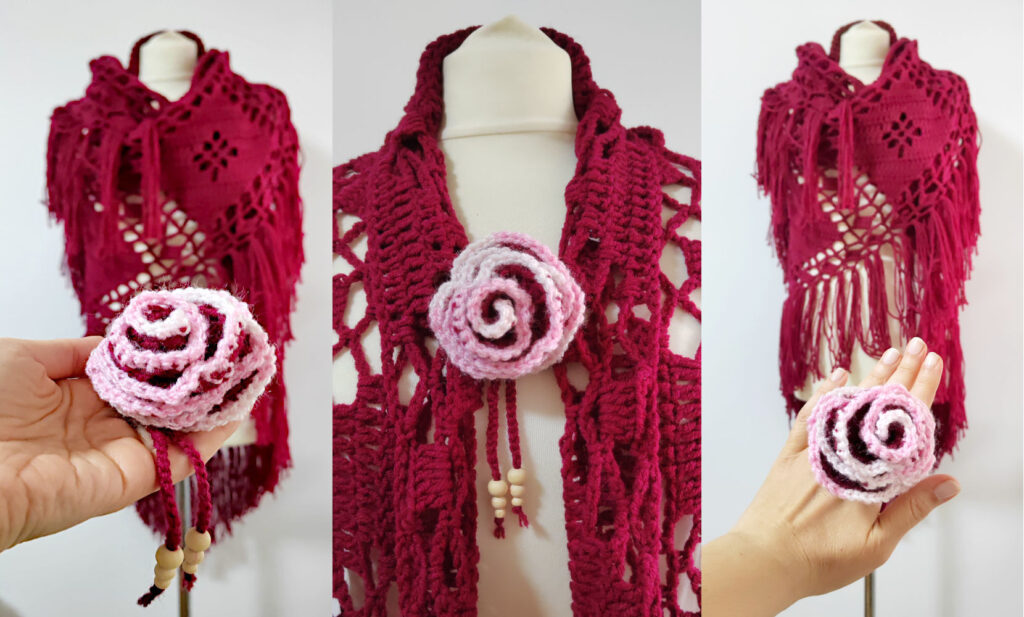
A Perfect Match for the Diamond Shawl
This particular set of instructions accompanies my Diamond Shawl design. The rose echoes the softness and romantic feel of the shawl while adding a small decorative touch that can be worn separately as a brooch or attached to the shawl itself.
It’s a lovely way to use leftover yarn from the project and create something extra without much additional time.
Simple, Versatile, and Fun to Make
The crochet rose is beginner-friendly, quick to crochet, and highly adaptable. You can experiment with different yarns, hook sizes, or even combine colors for a more dimensional effect. Add a few dangling items with beads, and you’ll get an entirely different vibe. Whether you make it as a brooch, embellishment, or small handmade gift, it’s one of those little projects that bring a lot of joy for very little effort.
And who knows — it might become your signature finishing touch too.
level
To make these crochet roses you will need basic level of crocheting skills
size
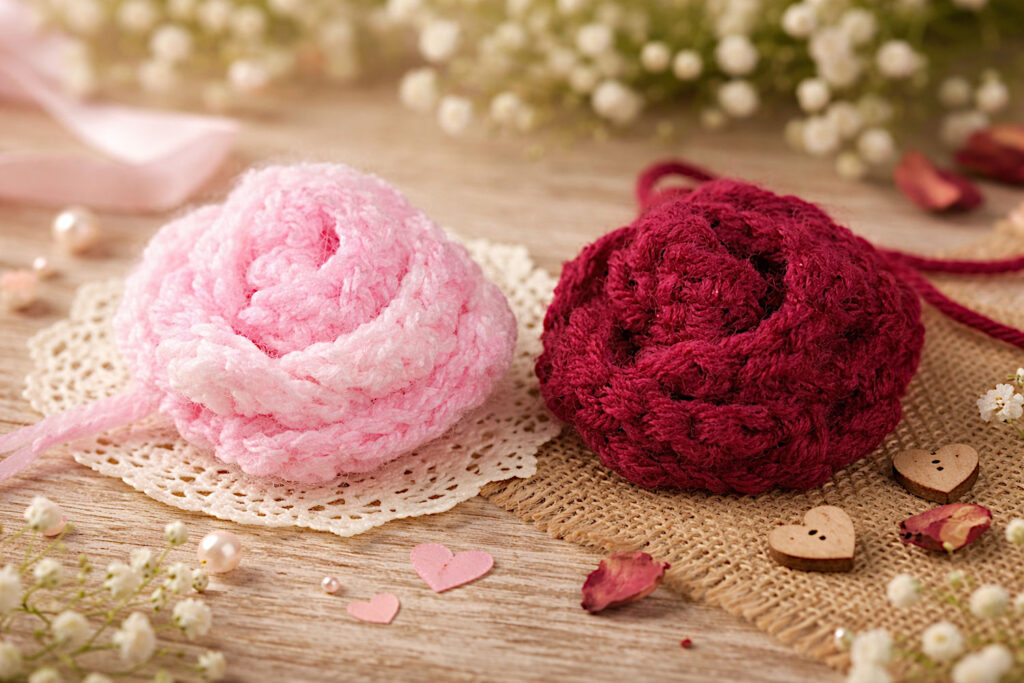
The size will depend on the type of yarn and size of hook you choose. Roses that you can see in the photos are 6 cm / 2.3′ wide and about 4 cm / 1.5′ tall.
material
leftover yarn of your choice
3.5 mm hook
Tapestry needle
A brooch pin or velvet ribbon if you want to make a necklace
A few wooden beads (optional)
Abbreviations
st – stitch
sc – single crochet
dc – double crochet
tr – treble crochet
n.st – next stitch
flo – front loop only = insert the hook only in the front loop of each stitch
Instructions
1. Crocheting the Rose
The rose is made by crocheting 6 petals, one by one but continuously, without breaking yarn. To get to the place where each next petal is made, you need to rotate the work and do a series of sc along the bottom side of the initial chain. This is described in detail in further text and accompanied by photographs.
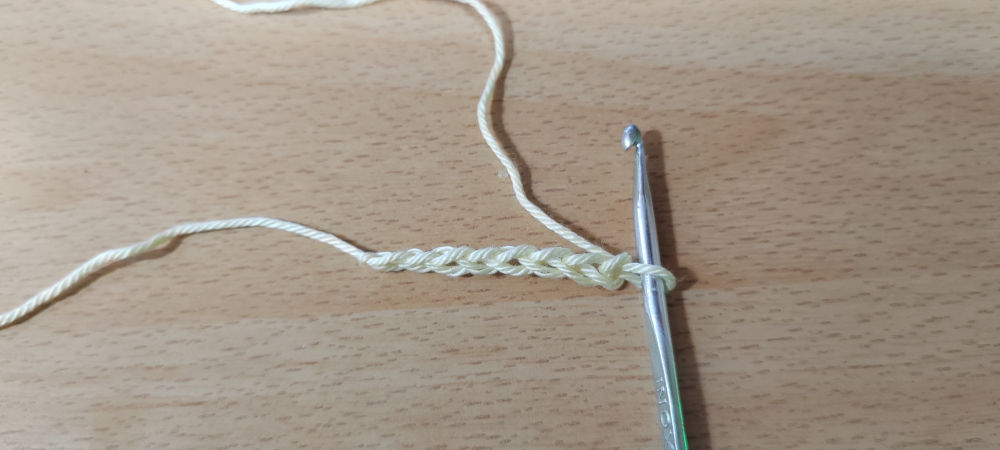
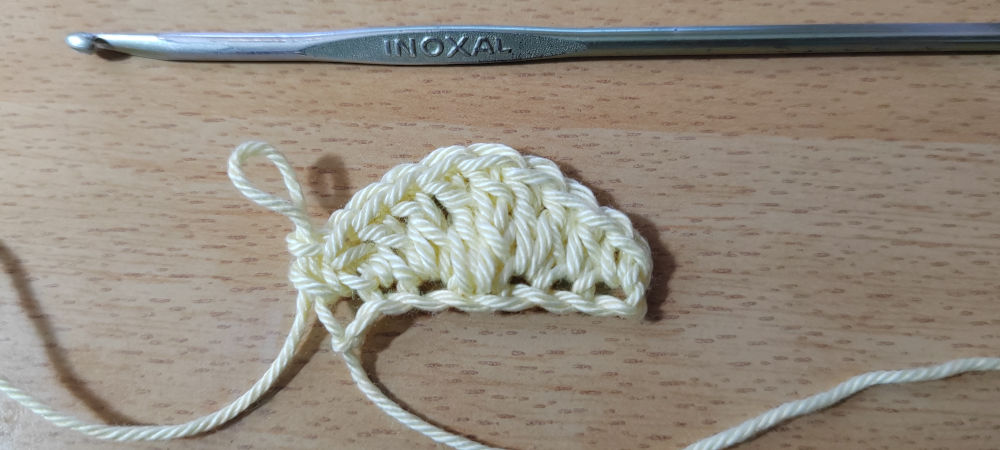
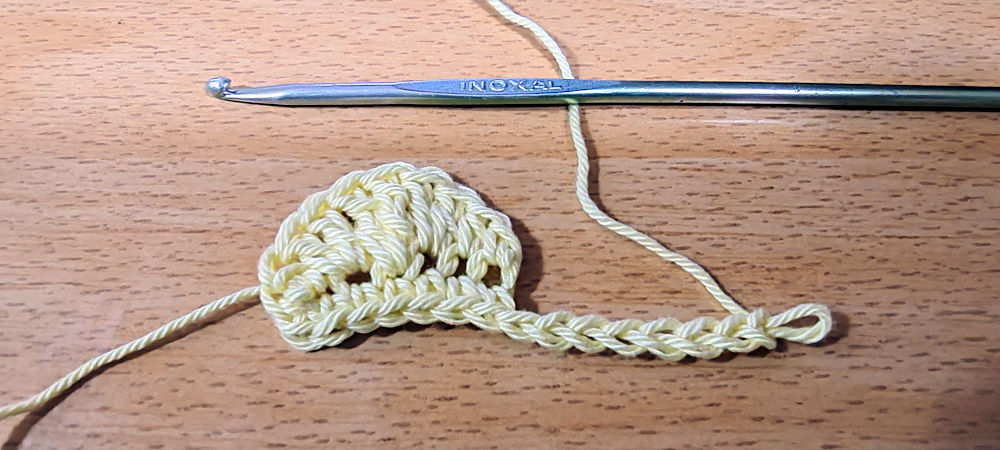
Start by ch8, but leave about 20 cm / 8` long tail for sewing the petals together.
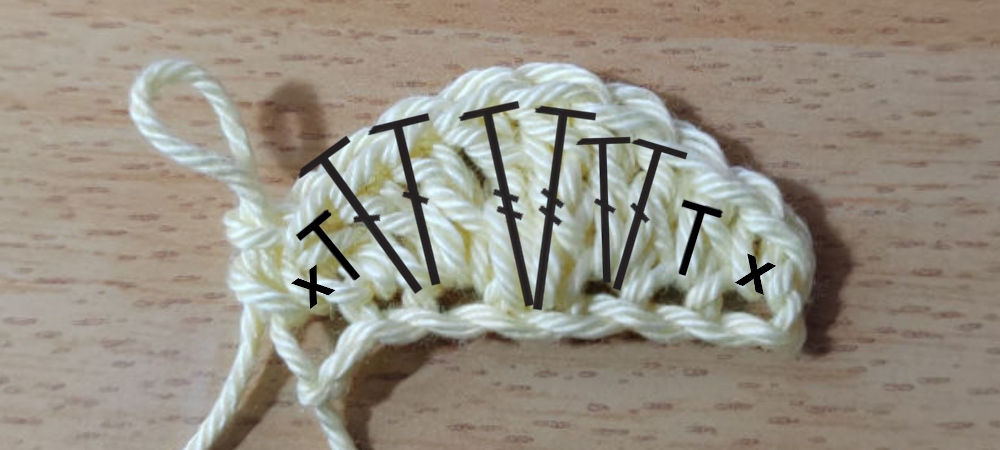
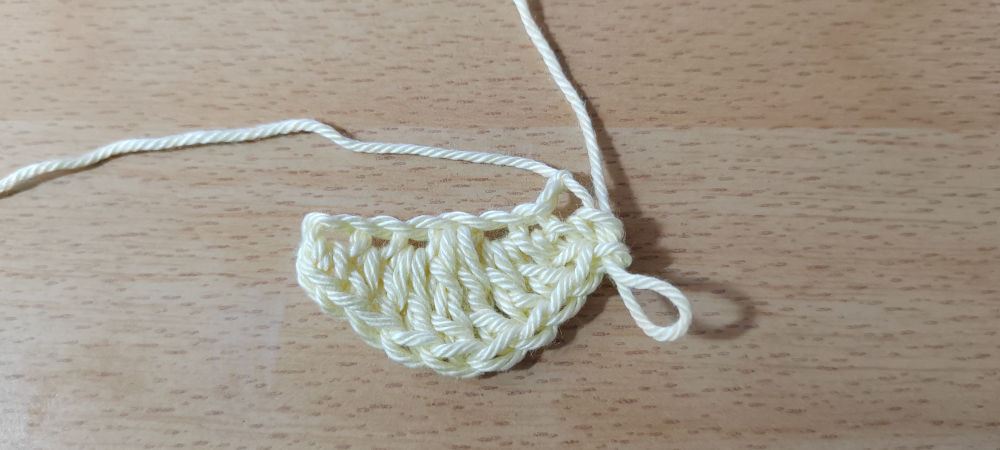
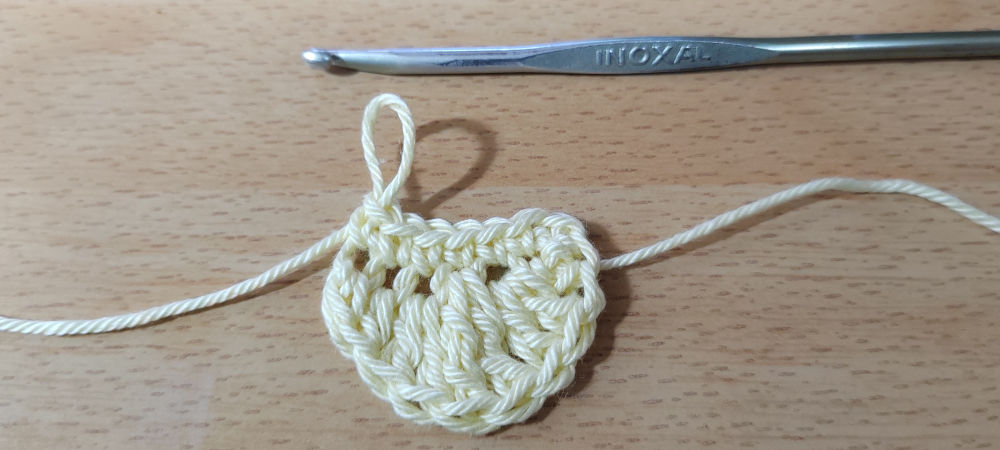
1st petal – 1sc in 2nd st from hook, 1hdc in n.st, 2dc in n.st, 2tr in n.st, 2dc in n.st, 1hdc in n.st, 1sc in last st. Rotate the work clockwise and do 1sc in the same st as the previous sc, then 6sc in the remaining sts. You will be doing these sts along the bottom side of the initial chain.
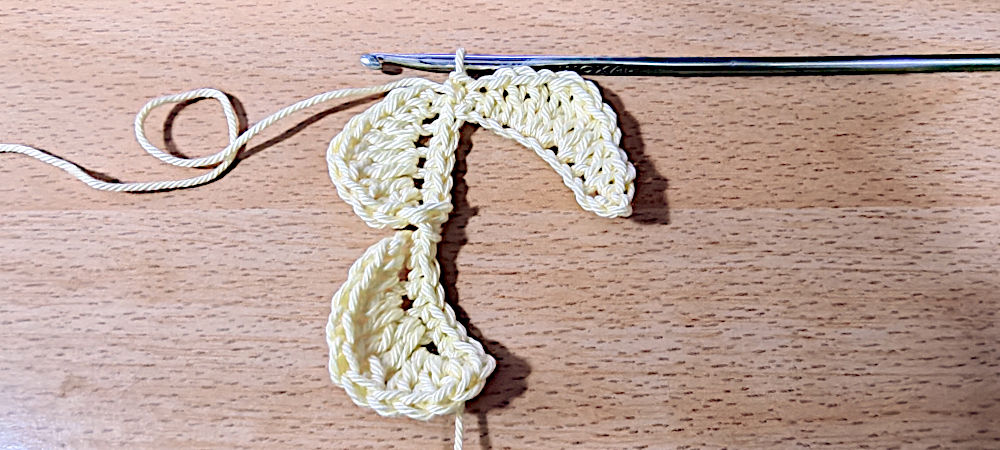
2nd petal – ch8, work like 1st petal.
Chain 8
First petal
First petal - symbols
Rotated work
Single crochet along the bottom side of initial chain
Chain 8 - beginning of 2nd petal
First and second petal
First and second petal rotated
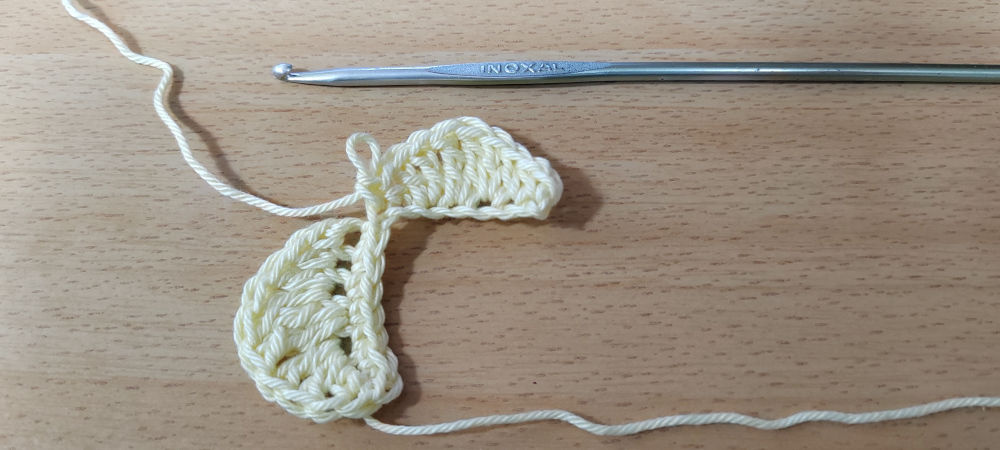
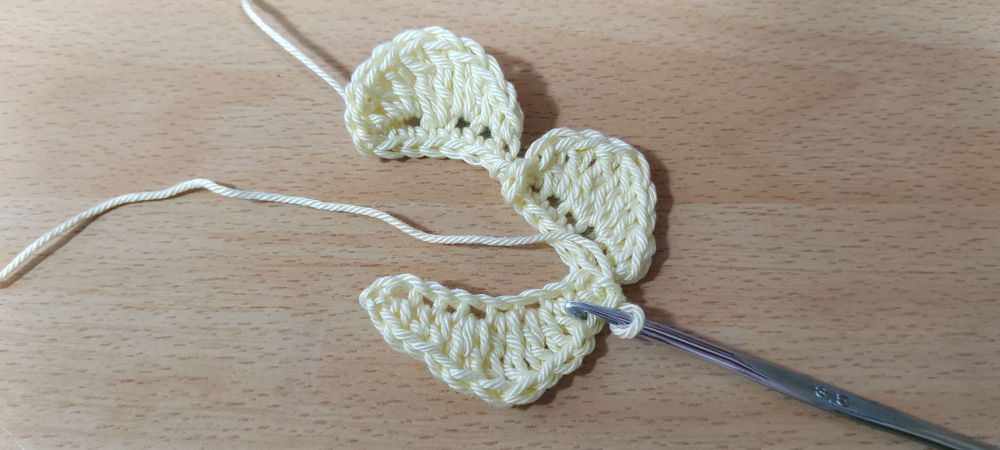
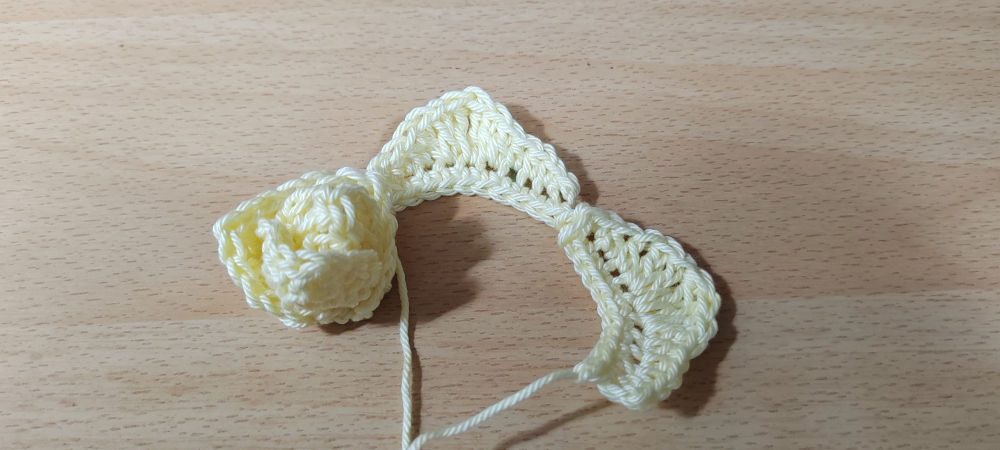
3rd petal – ch10, 1sc in 2nd st from hook, 2hdc, 2dc in n.st, 2tr in n.st, 2dc in n.st, 2hdc, 1sc in last st. Rotate the work clockwise and do 1sc in the same st as the previous sc, then 8sc in the remaining sts.
4th petal – ch10, work like 3rd petal.
Chain 10 - beginning of 3rd petal
1st, 2nd and 3rd petal
Petals rotated
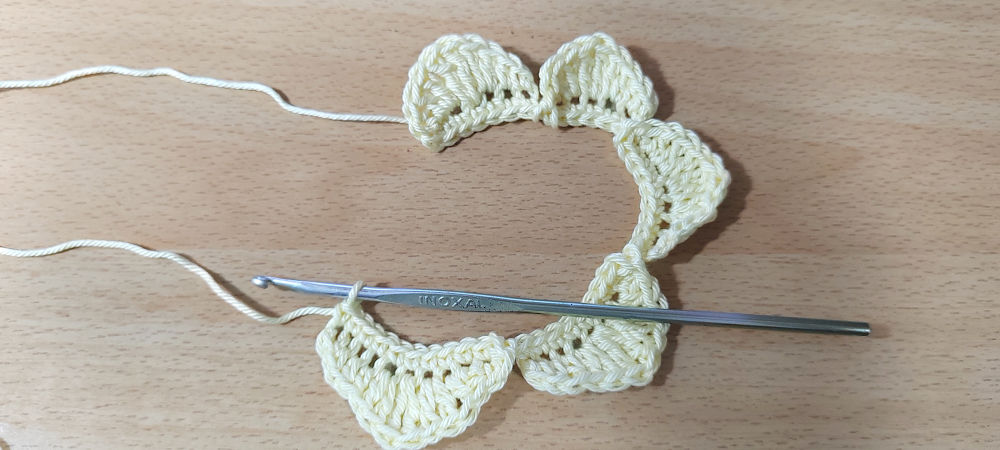
First 3 petals finished
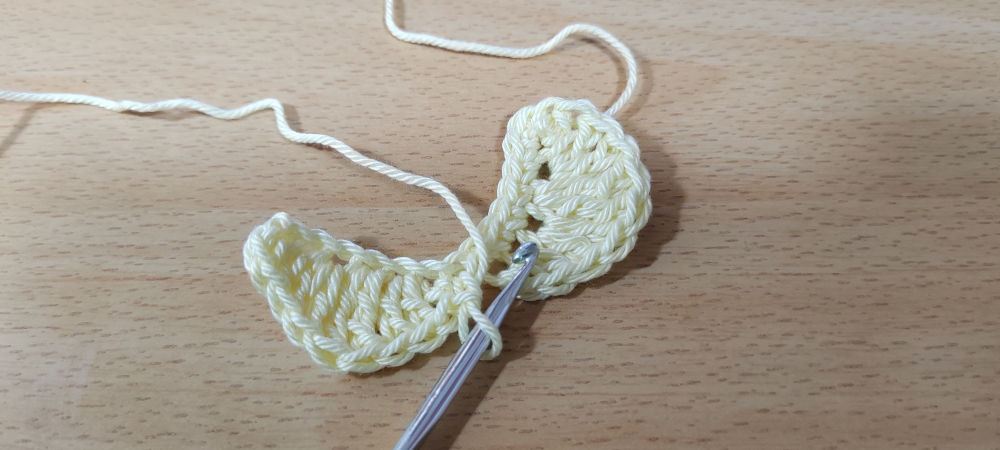
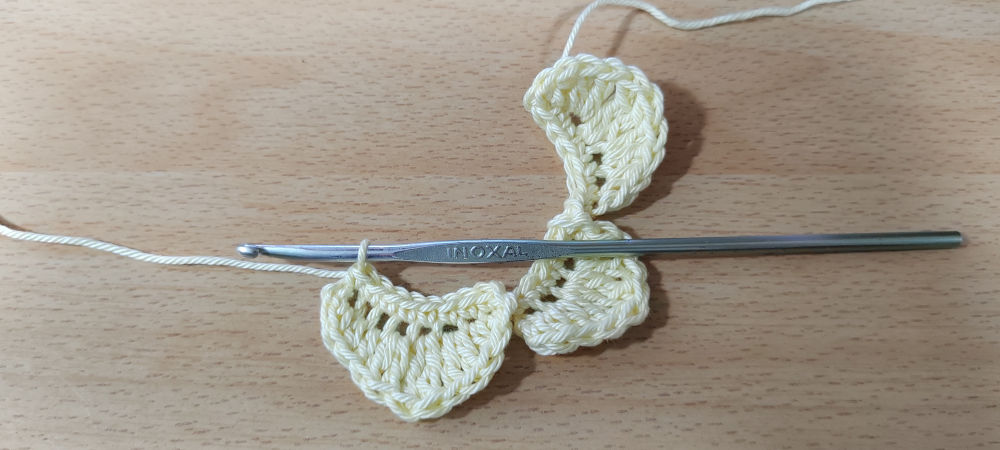
5th petal – ch12, 1sc in 2nd st from hook, 1sc in n.st, 2hdc, 2dc in n.st, 2tr in n.st, 2dc in n.st, 2hdc, 1sc in n.st, 1sc in last st. Rotate the work clockwise and do 1sc in the same st as the previous sc, then 10sc in the remaining sts.
6th petal – ch12, work like 5th petal. Break yarn, weave in end.
Four petals finished
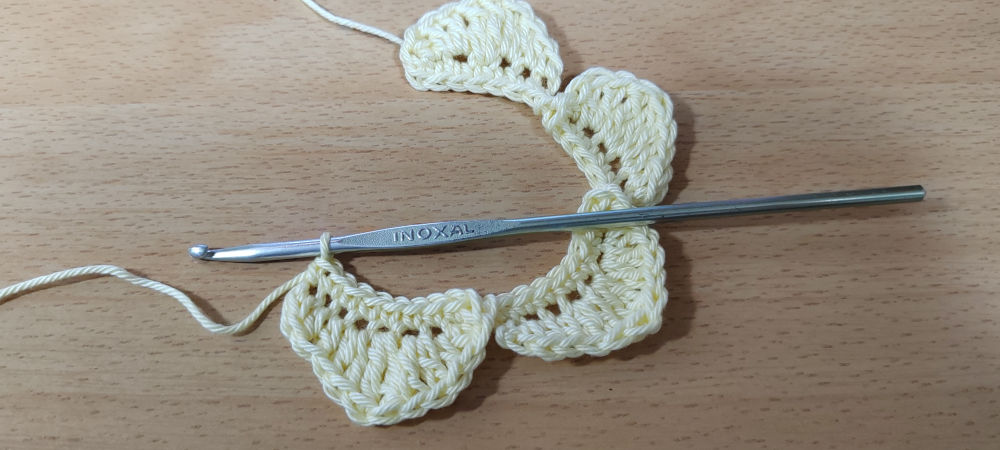
Five petals finished
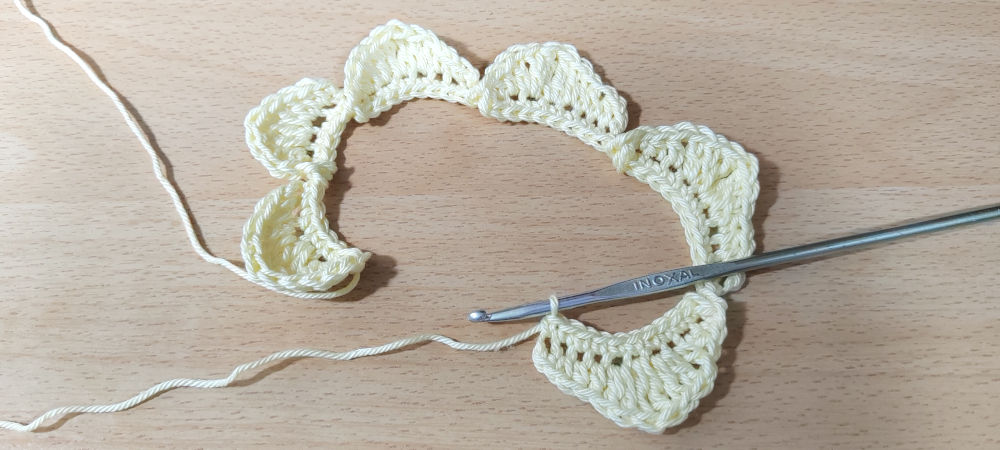
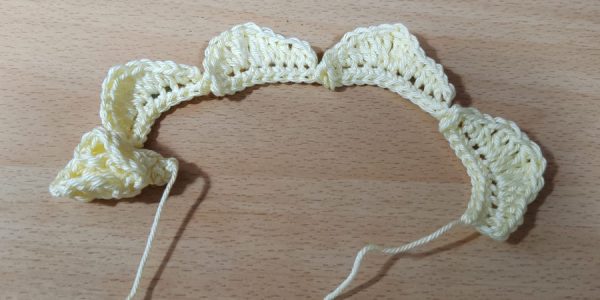
Six petals finished
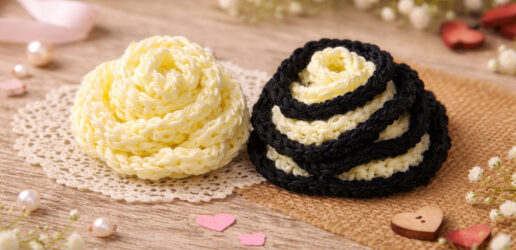
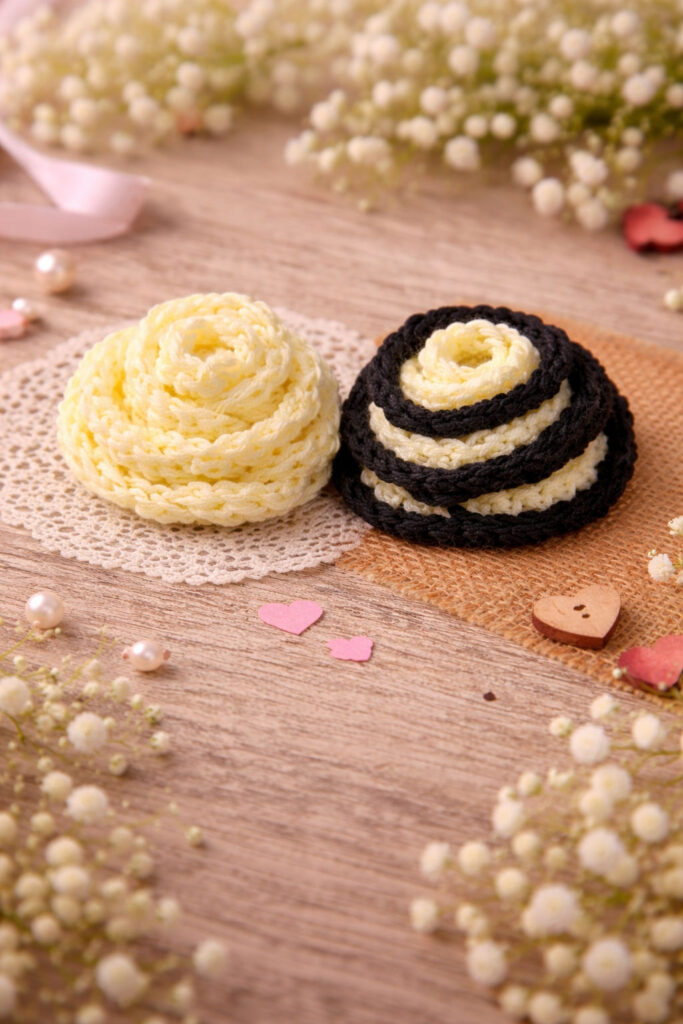
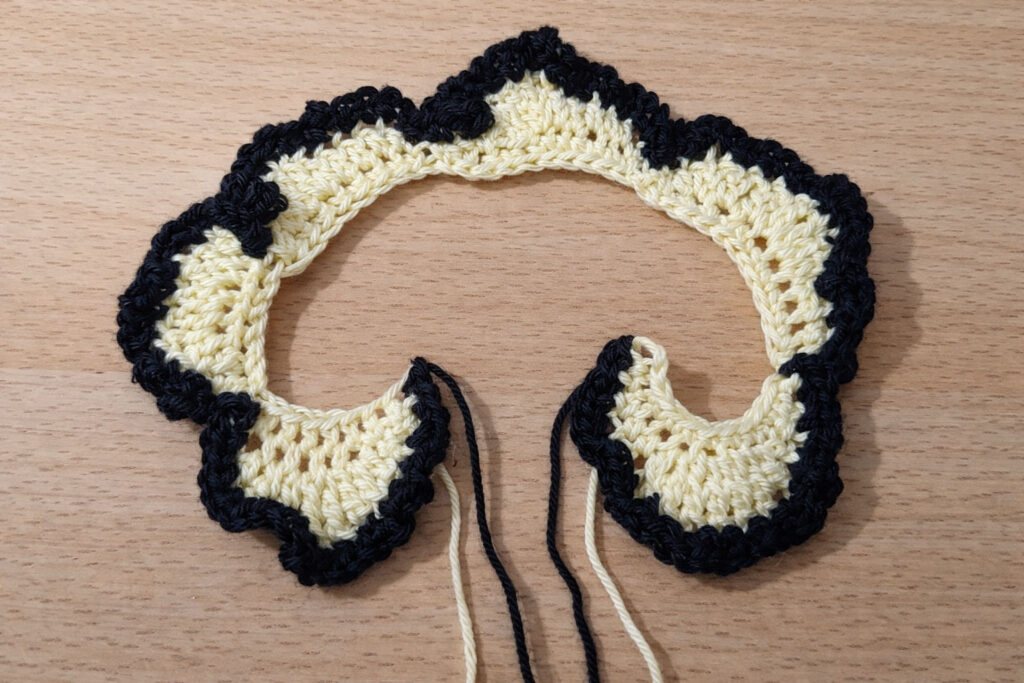
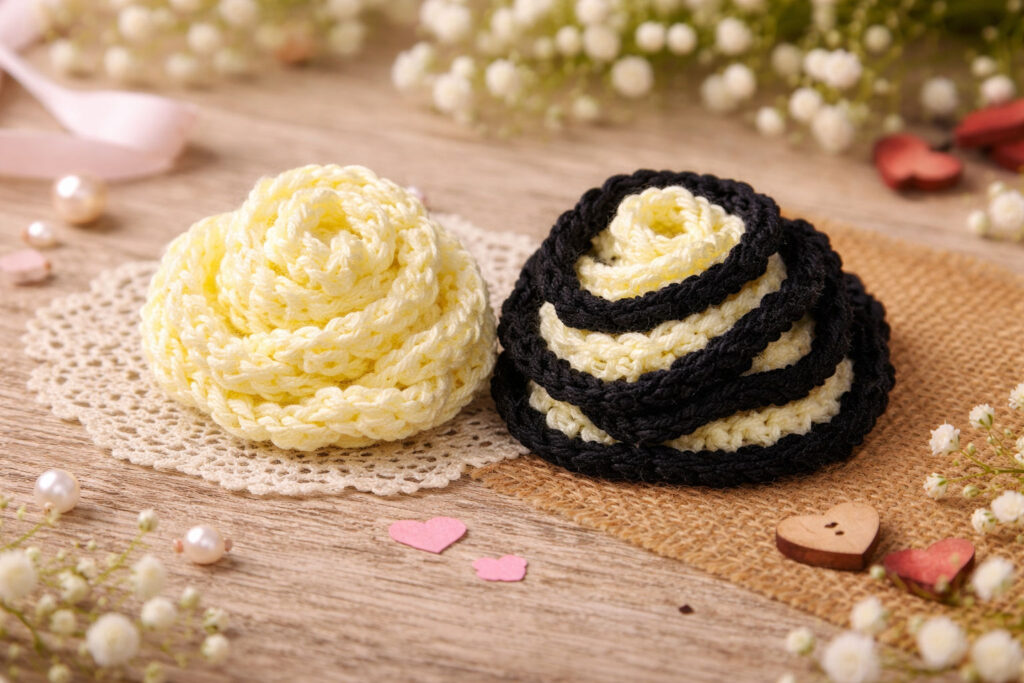
2. Contrasting Border
If you want to decorate your rose with a border, you can do so before you sew the petals together.
After finishing the last petal, change color but make sure you choose lighter weight yarn than the yarn you used for the rose. Otherwise, if you opt for the same yarn weight, this other yarn will dominate over the first one and the basic color will be almost completely invisible. Of course, that can create a nice effect too in case you want to point out the border yarn color.
In every stitch of the petals work flo-3sc, while in joins do flo-2sc together. At the end of the round break yarn and weave in end.
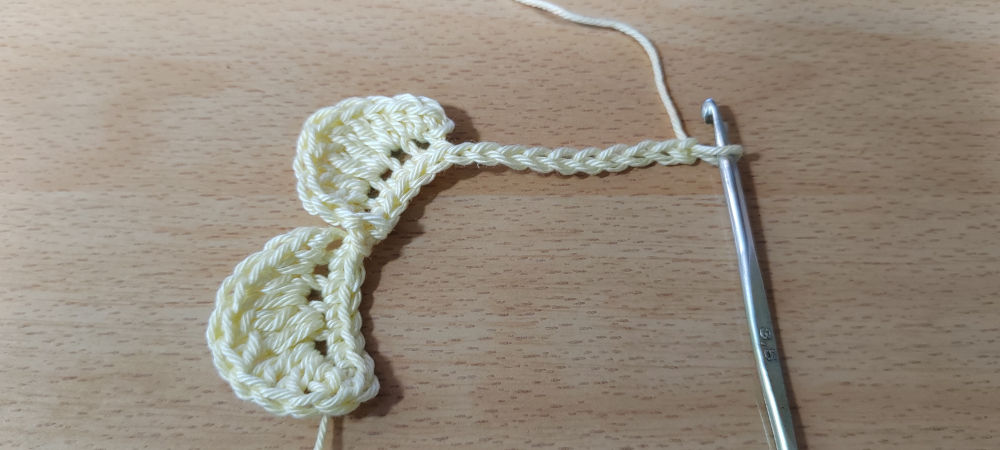
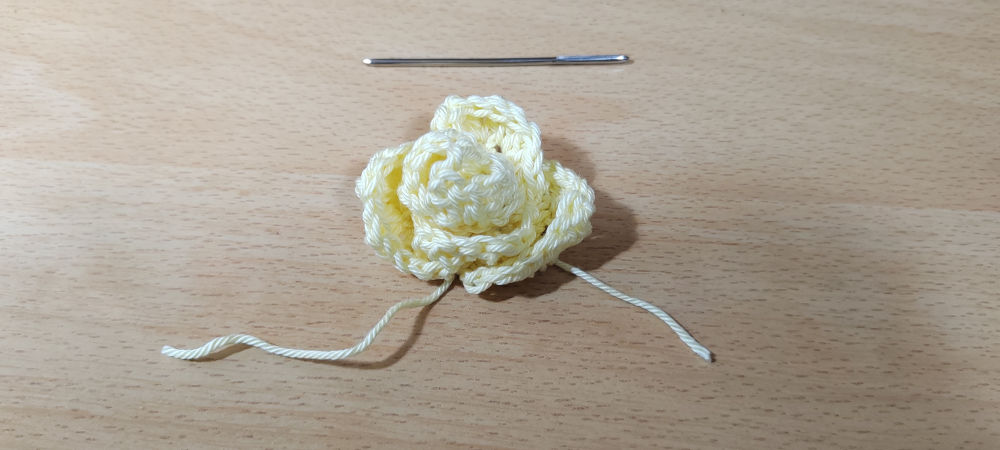
3. Sewing The Petals Together
Tread yarn needle with yarn tail that you have left at the beginning of work. Start rolling the petals, starting from the first one. On the bottom side of the rose sew petals to its base, one by one.
Beginning of rolling the rose
Half rolled up rose
Finished rose
Two Variations - With Border or Without
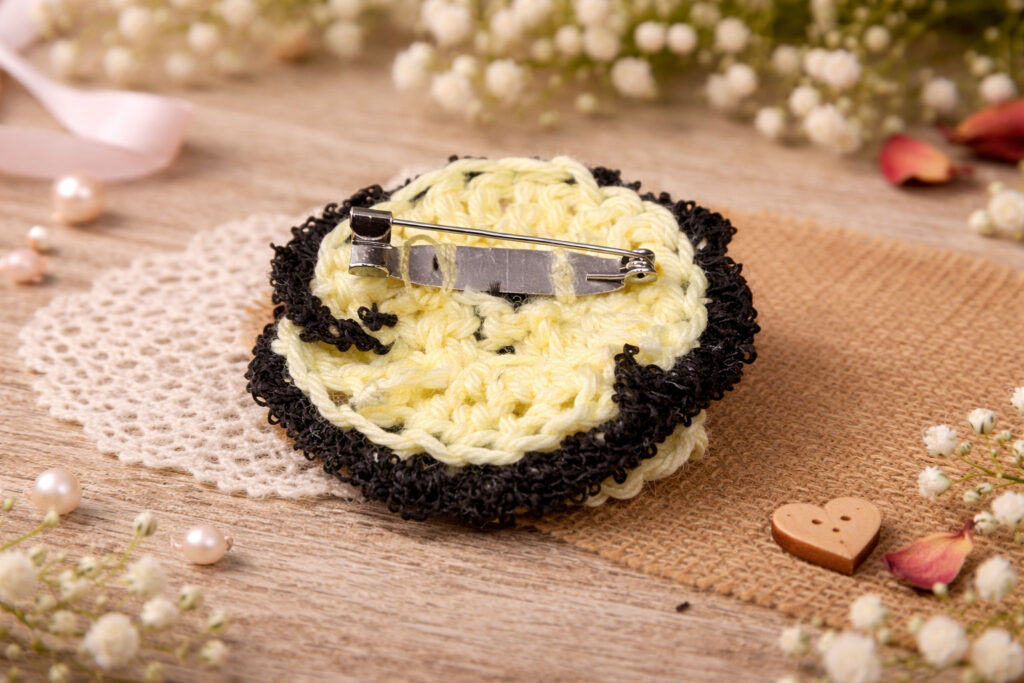
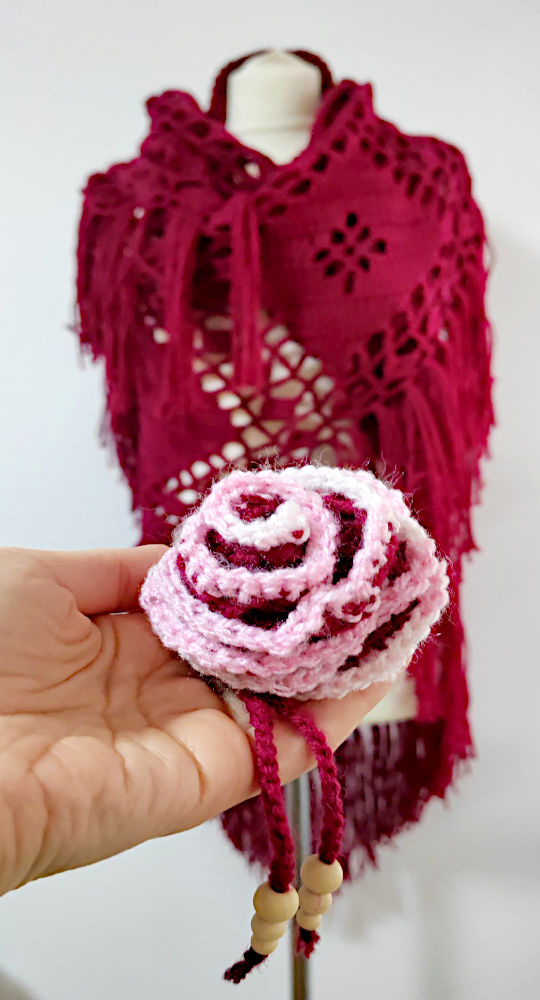
Brooch option
To make the brooch, hand sew a brooch pin at the base of the rose.
As additional decoration, under the brooch pin you can attach yarn and ch as many sts as you like. Through the end of the chain you can pull a few wooden beads and secure with a knot. Make 2 or 3 of these yarn chains with beads, at your own preference.
The rose which went with the Diamond Shawl
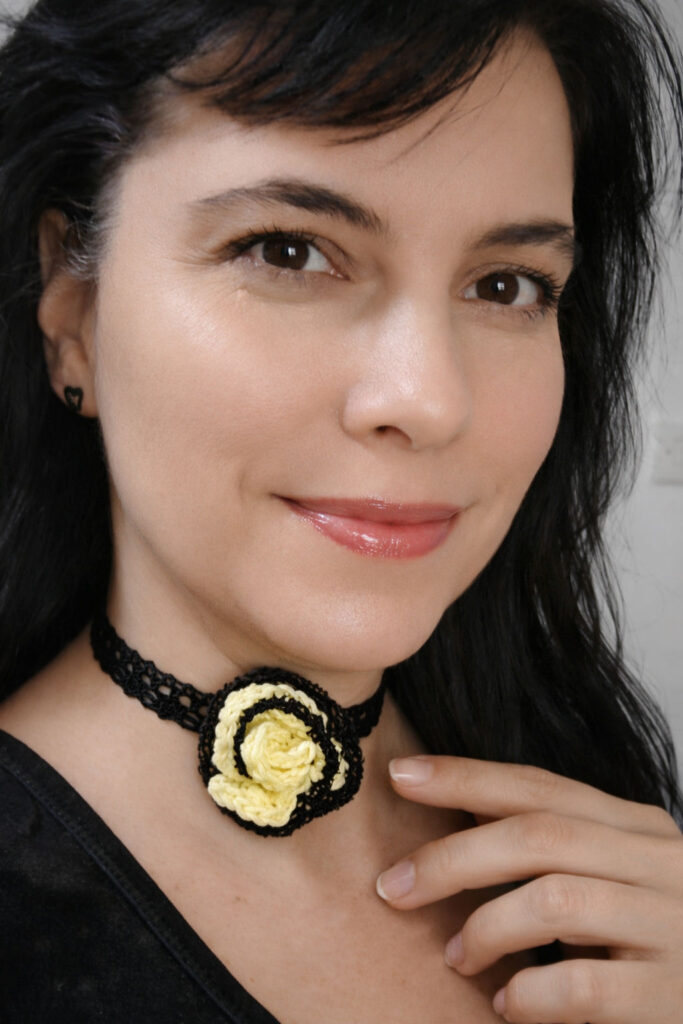
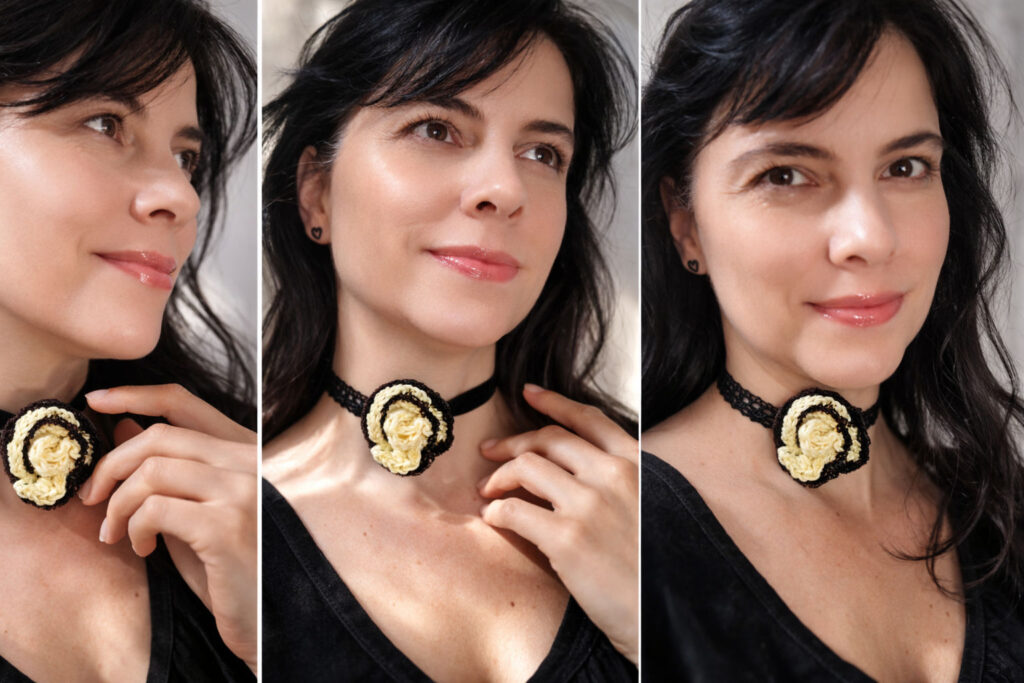
Choker Necklace Option
The so called “choker” necklace is incredibly easy to make. Since you’ve already attached the brooch pin to it, use it to attach the rose to a piece of ribbon. Use any type of ribbon you like – satin, velvet, or lace like the one I used and which you can see in the photos. Measure and cut the ribbon in the length suitable to tie it at the back of your neck, and… that’s it!
You probably already got used to my multi-functional ideas so far. Well, this little flower is a part of that 2 in 1 and 3 in 1 collections too.
Your Impressions
If you enjoyed reading about how to crochet a simple rose, please share this post with all those creative people who’d like to give this project a try.
Have you made roses like these so far? Do you prefer the rose as a brooch or as a necklace, or maybe both? Write in the comments and share your experiences and impressions. I always read all the comments, I’m happy to reply, help and accept every critic or suggestion.
💛Need more crocheting inspiration?
This piece is just the beginning. See other crochet items here.