Crochet "Duchess" Gloves
Crochet Fingerless Gloves to Match the Duchess Shawl
FREE PDF pattern for crochet fingerless gloves. Step-by-step tutorial, beautiful design, with added satin ribbon or without.
Description
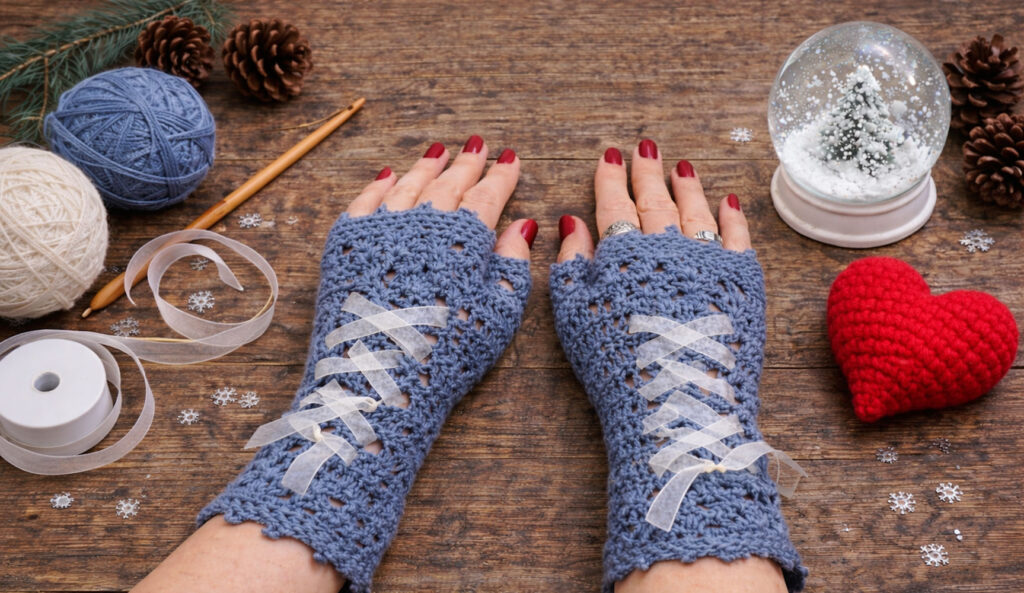
These crochet fingerless gloves with lace pattern are a part of the set which consists of the “Duchess” Shawl together with this piece of autumn accessory.
The gloves are crocheted from the same material as the shawl. The main pattern consists of double crochet stitches, while the central motif is one of the lacy patterns used on the shawl.
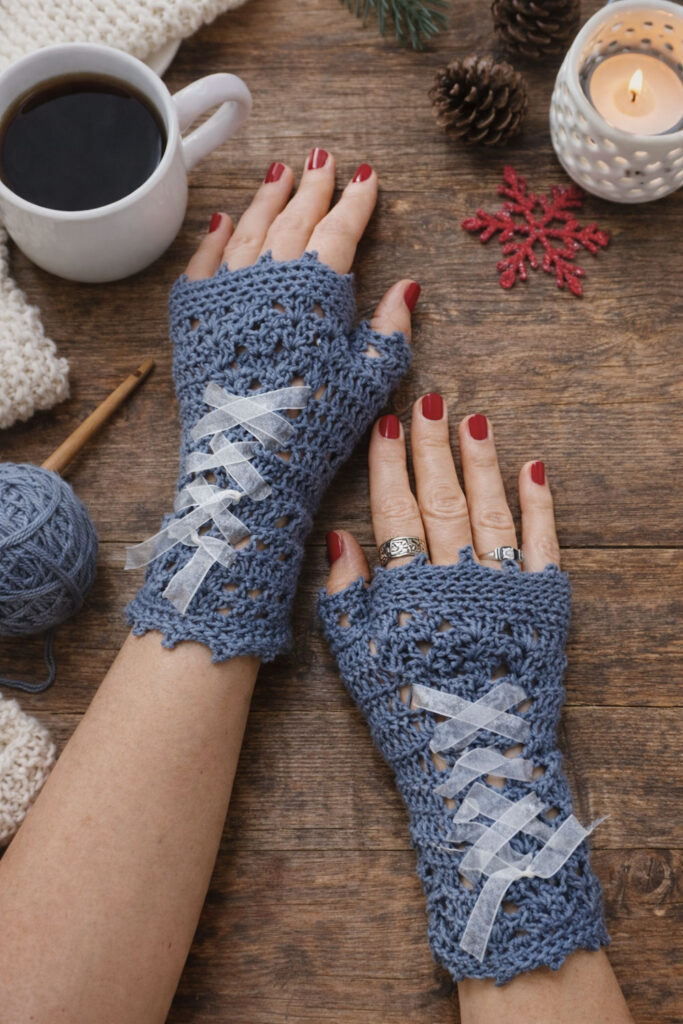
Upper and lower edges are done with single crochet stitches and the last round with picots. Picots add to their elegance and make them even a bit romantic.
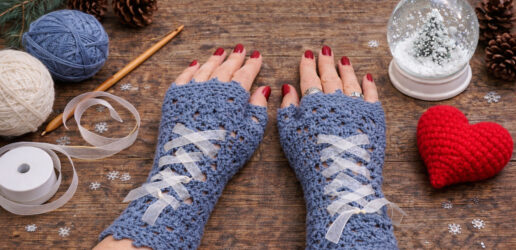
They are decorated with a satin ribbon, which is one more delicate touch. However, even without the ribbon the gloves look sophisticated and the selection of stitches is very effective.
Size
S/M
Price
Crochet pattern – Free
Crochet lace
When I was thinking about how to start these fingerless gloves, which would be a part of the set with my Duchess Shawl, the only option was to incorporate one of the lace crochet stitches from the shawl itself into this project.
The gloves are worked from the wrist to the fingers and in the rounds. The palm part consists of double crochet stitches, while the upper one is a lace pattern with 3 groups of 4dc separated by chains in the middle. The thumb opening is completed separately from the rest of the piece.
level - intermediate
To crochet Duchess fingerless lace gloves, you will need intermediate knowledge of crocheting in the rounds and joining with a slip stitch. The stitches in this design are single crochet, double crochet, chain and picot. Also, you should be familiar with back-loop crochet.
material
- Size S/M: About 40gr of yarn for hook 3-4 (125m / 50 gr); hook no. 3.5
- Size L/XL: About 50gr of yarn for hook 3.5-5; hook no. 4.5
- About 1m of satin ribbon to decorate the gloves (optional)
Abbreviations
ch – chain
st(s) – stitch(es)
sl.st. – slip stitch
sc – single crochet
dc – double crochet
picot – ch3, 1sc in 3rd st from hook
initial shell – in 1 stitch (ch3, 1dc, ch2, 2dc)
shell – in 1 stitch (2dc, ch2, 2dc)
rnd – round
instructions
Intro
The gloves are completed from down upward and in rounds. The border on the lower edge is worked after completing the rest of the glove. The border can be worked with picots or without them, as desired. In each round insert the hook into the back loop.
Right glove
Start with ch30 very loosely and close the ring with a sl.st.
Rnd 1 – Initial shell in the 1st st, skip 2, shell in next st, skip 2., 18dc, skip 2, shell in the last st.
At the beginning of each next rnd, to get to the ch2 space, work like this: (sl.st in next st, sl.st. in the first ch2 space of the first shell).
Rnd 2 – Work initial shell in ch2 space, work shell in next ch2 space, skip 2, 18dc, skip 2, shell in next ch2 space. Join with a sl.st. in 3rd st of the initial ch3. (=18dc and 3 shells)
Rnds 3 to 7 – Repeat rnd 2. (=18dc and 3 shells)
Rnd 8 – Initial shell in 1st ch2 space, shell in next ch2 space, skip 2, 1dc, 2dc in next st, 14dc, 2dc in next st, 1dc, skip 2, shell in next ch2 space, sl.st. in 3rd st of the initial ch3. (=20dc and 3 shells)
Rnd 9 – Initial shell in the first ch2 space, shell in next ch2 space, skip 2, 1dc, 2dc in next st, 16dc, 2dc in next st, 1dc in next st, skip 2, shell in next ch2 space, sl.st. in 3rd st of the initial ch3. (=22dc and 3 shells)
Rnd 10 – initial shell in the first ch2 space, shell in next ch2 space, skip 2, 22dc, skip2, shell in next ch2 space, l.st. in 3rd st of the initial ch3. (=22dc and 3 shells)
Rnd 11 – Initial shell in the first ch2 space, shell in next ch2 space, skip 2, 1dc, 2dc in next st, 18dc, 2dc in next st, 1dc in next st, skip 2, shell in next ch2 space, sl.st. in 3rd st of the initial ch3. (=24dc and 3 shells)
Rnd 12 – Initial shell in the first ch2 space, shell in next ch2 space, skip 2, 1dc, 2dc in next st, 20dc, 2dc in next st, 1dc in next st, skip 2, shell in next ch2 space, sl.st. in 3rd st of the initial ch3. (=26dc and 3 shells)
Right thumb
Sl.sts to the first dc. Sl.st. in the same st, and sl.st. in the 12th st from it, but insert the hook through both loops. Pull tight. Continue with THUMB FOR BOTH GLOVES.
Thumb for both gloves
Rnd 1 – sl.st, ch3, 1dc in the same st, 2dc in next st, (2dc, 2dc in the same st)2x, 4dc, DO NOT do sl.st. in the 3rd st of ch3.
Rnd 2 – (3sc, picot)4x. Sl.st. in next st. Break yarn, weave in the end.
Part for the other 4 fingers
Rnd 1 – Attach yarn in the first dc of the last rnd that you worked before the thumb. Ch3, 14dc, 1dc in ch2 space, (4dc, 1dc in ch2 space)2x, 2dc, sl.st. in the 3rd st of ch3. (=30sts).
Rnd 2 – ch3, 29dc. DO NOT work sl.st. at the end of this rnd. (=30sts).
Rnd 3 – (3sc, picot)10x. Sl.st. in the 1st sc. Break yarn, weave in the end.
Left glove
From rnds 1 to 12 work like the right glove. Then work LEFT THUMB.
Left thumb
Turn your work. Sl.sts. to the first dc (which will be on the RIGHT of the shells when looking from the right side), turn your work. Sl.st. in that first dc, sl.st. in the 12th st from there. Continue instructions for the right glove, starting from THUMB FOR BOTH GLOVES above.
Border
Attach yarn in Rnd 1 in the first st on the left from the shells.
Rnd 1 – 18sc, (3sc in space between dc and first shell, 2sc in the center of shell)2x, 3sc in the last space between the shell and next dc, sl.st. in next st.
Rnds 2 and 3 – sc around (=32sts)
The 3rd round can be worked with (3sc, picot), like for the thumb and other fingers. Duchess Gloves in grey colour have the lower edge with picots, unlike the ones made from golden yarn.
If you like ribbons, you can pull satin laces through shells and tie them like you would tie shoe laces. However, the lacy part of the gloves is already very pretty so it will be more prominent without any decoration.

Donate If You Can
If my handmade items and designs have brought you inspiration and joy, consider making a small donation to support my work. Your generosity helps me continue crafting beauty, one stitch at a time. Even the smallest amount can go a long way.
Thank you for being a part of art and beauty in handicraft.