One of the most popular and easiest techniques for round crochet
This is a photo tutorial on how to start round crochet with a magic ring.
Method suitable for many projects
If you’ve got written instructions for a round crochet piece that requires starting with a magic ring, this is a tutorial that will be necessary to you if you still haven’t mastered this method.
Many projects which are made by crocheting in the rounds start with a magic ring, although, of course, this isn’t the only or the best way to begin every round crocheted item. Some of those projects are, for example, tablecloths, table mats/runners, doilies, round, square, triangular patchwork motifs, caps, brimmed hats that are started from the top center, rugs, round shawls, dolls, toys, and many others.
Starting your crochet projects with a magic ring is one of the most efficient ways to obtain a nice looking, and at the same time firm and solid circle which is sure not to unravel. This technique is very simple and you will master it in no time.
Step 1
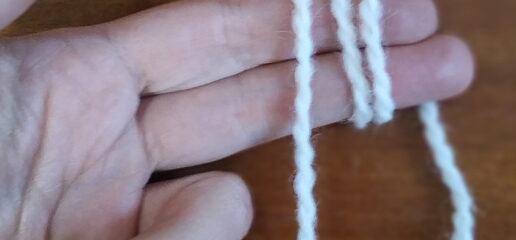
Wrap yarn around your 2 fingers, like shown in this photo, so that the end of yarn is on the right.
Step 2
With your crochet hook grab the working part of the yarn (on the left), under the 2 wraps.
Step 3
Pull the working yarn under the whole ring.
Step 4
Remove the ring from your fingers.
Step 5
Do 1 slip stitch to secure the ring.
Step 6
Then continue working stitches inside the magic ring. This photo shows ch3 and 11dc in the ring.
In this picture you can also see what happens when you pull the free yarn end – one of the 2 strings of yarn starts to close. DO NOT close it completely!
Step 7
Pull that string which started closing by its right end to close one part of the ring. Then pull the free yarn end to completely close the ring.
Step 8
Step 8 shows the entirely closed magic ring. Now you can do a slip stitch in 3rd loop of the initial ch3.
This way you have made round 1 of your project and you can continue crocheting in the rounds as your chosen instructions state.